Posts tagged Hammer Patterns

August 20, 2010

Pin Protectors are Vital Wear Parts

Tom Stanek

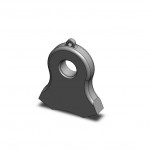
Disk rotor scrap metal shredders run with 1-2 hammers in each row and cover the remaining positions with pin protectors.  Are pin protectors important wear parts that contribute to wear life? Absolutely.

The role of pin protectors:

  1. Job one is protecting expensive hammer pins where no hammer exists.
  2. They assist in crushing and densifying scrap in the shredder.
  3. They help protect the rotor disks, limiting disk wear.
  4. They help maintain rotational energy of the rotor.  The weight of many pin protectors on the outer edges of the rotor make up the ‘flywheel’ that is your shredder rotor.

When new, pin protectors should extend about 2-4 inches past the disk.  Disk rotors are more forgiving on balance, but the closer you can match weights of opposing rows of pins and hammers, the better off you will be.  Some operators have favored larger protectors as a way to help gain rotating mass and “store” more rotational energy.  As with everything, there are limits.  Your shredder manufacturer can give you guidance on how much is too much for your mill size, rotor, and drive line.

Bottom line, don’t neglect pin protectors.  They are not just ‘along for the ride.’  With a little tweaking on size and weight, they can help maintain rotational energy and help save wear on your inner disks as well. Give us a call and let us help you find an edge in improved performance.

August 10, 2010

Hammer Patterns for Disk Rotors

Tom Stanek

Scrap metal shredder operators have many hammer patterns and methods for extending hammer wear life.  Disk rotors offer more combinations than spider rotors for most operators.

Disk rotors come in 10 or 11 disk models, often with 6 pin positions. You can use a 10, 12, or 14 hammer pattern to meet your production requirements. The balance of the openings are filled by pin protectors. Proper rotation of the hammers to different positions is the key to longer wear life and consistent production levels.

Some operators rotate in a few new hammers each maintenance cycle and keep mill output consistent.  Others run in sets.  They rotate edges and positions to achieve maximum hammer wear, then replace the set.  Extra hammers on the end positions help move material away from the side liners to reduce wear.  Extra hammers in the center position are preferred at times to get more work edges where the action is.

The pattern and rotation that works best depends on these factors:

  1. Feedstock mix
  2. Side liner wear
  3. Wear pattern on bottom grates
  4. Unusual wear on the rotor

Extra hammers benefit mills shredding a high percentage of sheet iron and appliances.  If shredding auto bodies, fewer hammers often yield positive results.  Too many hammers will impede the ability of scrap to enter the shredder, thus the upper limit of about 14 hammers mentioned earlier.  Wear on liners and grates indicate the work area.  Changing hammer positions can help distribute the material load to some degree.  High wear on your inner disks may indicate you are letting hammers and pin protectors wear too long.

As mentioned in the spider rotor post, finding your ‘sweet spot” requires a little experimentation and measurement.  If you can maintain density and recovery and use less new hammers, you’re moving in the right direction of controlling overall cost.  Don’t ignore wear parts life.  Casting costs are as real as your electric or fuel bills each month.

July 31, 2010

Hammer Patterns – Which is Right for You?

Tom Stanek

There are hammer patterns to fit every type rotor and feedstock situation.  The goal is to get effective production levels while extending the life of your wear parts. Shredder hammer patterns can play a key role in accomplishing these goals.

Spider rotors can have anywhere from 26 to 30 plus hammer positions. Although there are this many potential positions, in the majority of applications it is best in terms of performance and reduced wear parts cost, to use fewer hammers to achieve your goal.  There are not many patterns for a typical 4 arm spider rotor. You can reduce wear parts costs by dropping the number working hammers, using worn out hammers or pin protectors in the dropped positions.  Start, with 2, then 4, dropped working hammers and look at tons per hour and separation.
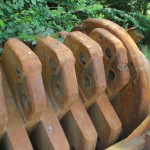
Reducing the hammer count in a spider rotor has produced mixed results.  Some machines achieved notable production gains, but often produced less dense scrap.  A density change indicates other factors were likely involved that were not controlled or noted.  Maintain grate size, monitor shred density and non ferrous recovery rates to be sure where your gains come from.   Finding your ‘sweet spot” requires a little experimentation and measurement.  If you can maintain density and recovery and use less new hammers, you’re moving in the right direction.  Whatever your combination of working hammers, be sure to weigh and balance your rows.  Spider rotors demand it.

Next time, disk rotors.