Blog Archives

June 25, 2011

Shredder Motor Change Out

Tom Stanek

Sailors have been known to wish for ‘fair winds and following seas’ as a farewell to respected colleagues.  Shredder foremen sometimes say farewell with “may you never burn up a motor before a vacation week.”  Okay, we made that up.  Shredder foremen don’t use flowery language.  But in the shorthand between those that shred steel for a living, it’s more like a ‘hey, hope you don’t have to use your spare.’  The point it is, those operators that have lost a motor understand it’s the start of a long week.  How do you make sure it’s no worse than a week?  Planning.  Here are the basics.

  1. Identify your spare. If you don’t own a spare electric motor, find one.  They don’t stock them at your local Grainger.  There are a lot of used motors out there.
  2. Is the spare stored and ready? The internal heaters need to be energized, and someone needs to turn it monthly, especially if it’s a wound rotor.
  3. Transport and lift. Many have their motors stored off site.  Get the wheels in motion early with transport to the shredder.  Have the weights and dimensions ready to give to your transportation broker.  How should it be rigged and lifted?  What crane companies and choices are there? What kind of swing radius is available?  Have these details on file so you can line up trucks and cranes in short order instead of making 20 phone calls at the last minute.
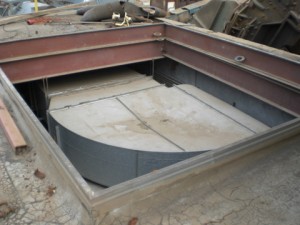
  4. Mounting: If it’s a direct replacement, be sure you have the tools to unbolt it. You’ll want to check the security of the mounting frame to the foundation once the old motor it off. If you have a loose stud in the foundation, maybe you have time to remove and grout in a replacement. If it’s not a direct fit replacement, you may have to adapt the mounting frame. If possible, you’ve made the new frame early on for the spare.  Have fasteners, wrenches, and shackles, and port-a-powers or know a company that does. If you change the mounting base, the old base may be grouted in place. You’ll need to chip out the old grout, clean the foundation, and have new grout in stock or be sure of your source. Any old grout will not work. It’s very strong epoxy that will not settle or crack. Chipping it out isn’t a simple job. Have the tools to do it or at least a list of them ready when the need arises. Check with your motor vendor or service rep about shimming in the new motor frame base and avoiding grout. The decision will be based on the conditions at the time.
  5. Electrical connection. If the spare is not a direct replacement, is the starter, LR tank, and other items compatible? Do you have sufficient cooling air volume for this motor? Will the stator & rotor main conductors match the motor connecting locations? Heavy conductors do not flex well. If you change styles of motor, you may have a major wiring job ahead of you. Do the connecting lugs fit in the electrical terminations? What about the changes for temp RTD’s, RPM monitor, internal heaters? How about wiring in the power factor correction capacitor bank? Any pre-planning and prep you can do here can lessen days of OT electrical rates.
  6. Cooling air or water. You may need a new sheet metal exhaust duct or alter the water piping (depending on air or liquid cooling). Be ready to change supply air filters or flush your cooling system if time allows.
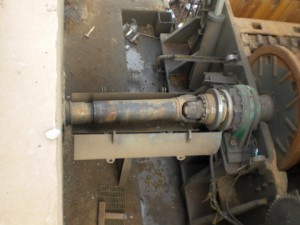
  7. Coupling connection. Have the tools and parts ready to disconnect the motor from your drive line. Check alignment of the new motor to main dimensions required of your installation. The motor axis and rotor axis should be level and parallel to each other, but not necessarily in line. Your shredder manufacturer and drive line specialist can advise the offset specs.
  8. During the change out, find out what may have caused the motor failure. For example, a seized drive shaft universal joint may have caused a motor bearing failure. If you don’t correct that problem, you may have the same motor bearing failure with the replacement motor.
  9. Having the plan in place prior to the problem will help you get back on line sooner. It may also let you delegate the initial steps to your acting foreman while you try to avoid cutting short a vacation week. That said, may you never burn up a motor before a vacation week.

Roof-Hatch-Exhaust-Duct-11-300x225Motor-Lift-Out-1-300x225
Root-of-the-problem-1-300x225

August 20, 2010

Pin Protectors are Vital Wear Parts

Tom Stanek

Disk rotor scrap metal shredders run with 1-2 hammers in each row and cover the remaining positions with pin protectors.  Are pin protectors important wear parts that contribute to wear life? Absolutely.

The role of pin protectors:

  1. Job one is protecting expensive hammer pins where no hammer exists.
  2. They assist in crushing and densifying scrap in the shredder.
  3. They help protect the rotor disks, limiting disk wear.
  4. They help maintain rotational energy of the rotor.  The weight of many pin protectors on the outer edges of the rotor make up the ‘flywheel’ that is your shredder rotor.

When new, pin protectors should extend about 2-4 inches past the disk.  Disk rotors are more forgiving on balance, but the closer you can match weights of opposing rows of pins and hammers, the better off you will be.  Some operators have favored larger protectors as a way to help gain rotating mass and “store” more rotational energy.  As with everything, there are limits.  Your shredder manufacturer can give you guidance on how much is too much for your mill size, rotor, and drive line.

Bottom line, don’t neglect pin protectors.  They are not just ‘along for the ride.’  With a little tweaking on size and weight, they can help maintain rotational energy and help save wear on your inner disks as well. Give us a call and let us help you find an edge in improved performance.

August 10, 2010

Hammer Patterns for Disk Rotors

Tom Stanek

Scrap metal shredder operators have many hammer patterns and methods for extending hammer wear life.  Disk rotors offer more combinations than spider rotors for most operators.

Disk rotors come in 10 or 11 disk models, often with 6 pin positions. You can use a 10, 12, or 14 hammer pattern to meet your production requirements. The balance of the openings are filled by pin protectors. Proper rotation of the hammers to different positions is the key to longer wear life and consistent production levels.

Some operators rotate in a few new hammers each maintenance cycle and keep mill output consistent.  Others run in sets.  They rotate edges and positions to achieve maximum hammer wear, then replace the set.  Extra hammers on the end positions help move material away from the side liners to reduce wear.  Extra hammers in the center position are preferred at times to get more work edges where the action is.

The pattern and rotation that works best depends on these factors:

  1. Feedstock mix
  2. Side liner wear
  3. Wear pattern on bottom grates
  4. Unusual wear on the rotor

Extra hammers benefit mills shredding a high percentage of sheet iron and appliances.  If shredding auto bodies, fewer hammers often yield positive results.  Too many hammers will impede the ability of scrap to enter the shredder, thus the upper limit of about 14 hammers mentioned earlier.  Wear on liners and grates indicate the work area.  Changing hammer positions can help distribute the material load to some degree.  High wear on your inner disks may indicate you are letting hammers and pin protectors wear too long.

As mentioned in the spider rotor post, finding your ‘sweet spot” requires a little experimentation and measurement.  If you can maintain density and recovery and use less new hammers, you’re moving in the right direction of controlling overall cost.  Don’t ignore wear parts life.  Casting costs are as real as your electric or fuel bills each month.

July 31, 2010

Hammer Patterns – Which is Right for You?

Tom Stanek

There are hammer patterns to fit every type rotor and feedstock situation.  The goal is to get effective production levels while extending the life of your wear parts. Shredder hammer patterns can play a key role in accomplishing these goals.

Spider rotors can have anywhere from 26 to 30 plus hammer positions. Although there are this many potential positions, in the majority of applications it is best in terms of performance and reduced wear parts cost, to use fewer hammers to achieve your goal.  There are not many patterns for a typical 4 arm spider rotor. You can reduce wear parts costs by dropping the number working hammers, using worn out hammers or pin protectors in the dropped positions.  Start, with 2, then 4, dropped working hammers and look at tons per hour and separation.

Reducing the hammer count in a spider rotor has produced mixed results.  Some machines achieved notable production gains, but often produced less dense scrap.  A density change indicates other factors were likely involved that were not controlled or noted.  Maintain grate size, monitor shred density and non ferrous recovery rates to be sure where your gains come from.   Finding your ‘sweet spot” requires a little experimentation and measurement.  If you can maintain density and recovery and use less new hammers, you’re moving in the right direction.  Whatever your combination of working hammers, be sure to weigh and balance your rows.  Spider rotors demand it.

Next time, disk rotors.

June 21, 2010

Fire Prevention for Scrap Recyclers

Tom Stanek

FIRE PREVENTION

Summer is here and the possibilities of a fire in your scrap feed stock and fluff piles go up substantially. No one wants to get that call in the middle of the night that your yard is on fire.  Manage your operation to minimize risks at your shredder.

Some precautions to take:

  1. Keep your scrap piles at least twenty feed away from all processing equipment. Infeed conveyors, loaders, cranes, etc.
  2. Don’t accumulate large feed stock piles.  Process it.  If you are down for an extended period of time for maintenance, add fire break gaps to segregate large feed stock piles.
  3. Make sure your fire control systems are in place. Hoses and nozzles are in good condition. All fire extinguishers checked monthly. Discharged extinguishers moved to used tank area for refilling.
  4. Make sure there are no trash piles in the yard. Old pallets, Gaylord boxes etc. These all should be disposed of properly on a regular basis.
  5. Re-educate your inspectors to watch for hazardous materials which can start a fire. Batteries, gas tanks, propane bottles, all other flammable tanks.
  6. Make sure all shreds have been run off the conveyor belts and wet down the conveyors belts and area around the shredder. Especially over a long holiday weekend.
  7. Lastly, have a supervisor walk around the processing area to insure there are no hot spots. Make a person in each area also responsible to inspect the areas.
  8. Enforce after hours yard security.   Security needs to make night rounds of process areas.  Also, many fires are also intentionally set after hours by “unauthorized” visitors.

Have a safe production summer!!

May 3, 2010

Weld on Teeth for Your Feeder

Tom Stanek

K2 Castings’ wear parts line includes weld on teeth for your scrap metal shredder’s double feed roll (DFR). 

Maintain a good tooth profile on your DFR rolls to keep your feeder effective and productivity up.  Bars and AR Plate teeth work fine, but the edges wear down faster than you’d like.  Our weld on teeth provide a strong stable profile.  Once welded in place, you can add easily replaceable standard square stock to the tip so you can maintain sharp edges. 

The profile and edges keep tin and logs moving in, and help hold auto bodies and long stock for a controlled feed into your shredder. Try our DFR teeth. You’ll notice the difference. Contact us today.